| ArtisticHobbies.com |
|---|
| Hobby Resources * Model Building Projects * Modeling Resources * YouTube Channel |
| OTHER WEBSITES * Artistic Reefs |
Tamiya 1/16 Full Option King Tiger Tank - Page 3
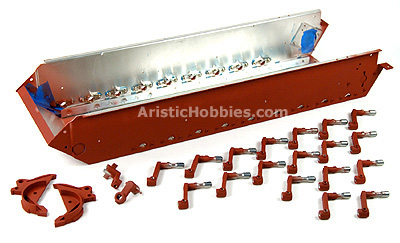
At this point your ready to start assemble of your model. Since you will be starting on the lower hull of your tank first which is made from metal. All the outside parts must be primed first before assemble. All the metal parts that will be used inside your model don’t need to be painted and is not recommended since it wont be exposed to the elements on the outside.
The primer I used on this model is Krylon Ruddy Brown Primer, which can be found at any Walmart Store for a few dollars. One can is all you need to prime all your outside metal parts.
 You can use any brand of primer you want just make sure it’s for metal. I used this color because it’s very close to what was used on German tanks back in WWII, Plus the paint dries in about 10 minutes. If you live in a colder climate, I would let dry overnight. But regardless where you live, I always let my primer dry overnight before handling.
The Krylon Ruddy Brown Primer can also be used on all your plastic parts and bonds great to the plastic with no side affects.
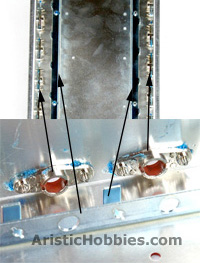 Now your ready for assemble! Pictured to your left is the Torsion Bar Stay and Suspension parts located inside the metal lower hull. Notice the blue stuff oozing out from the suspension parts. That’s the Liquid Thread Lock I used on all the bolts that hold the suspension parts in place.
Again the Liquid Thread Lock is included with your model kit and there’s plenty to do your entire model with leftovers to boot.
At this point you will be finding yourself putting things together pretty quickly because stages 1-8 are pretty straightforward and can be finished in about an 2 hours time. Just read and follow the pictures to the T and you will have no snags or problems.
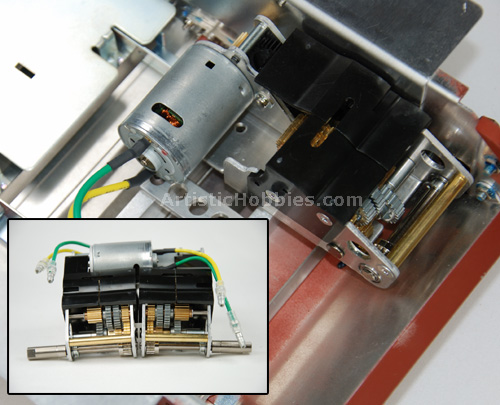
Stage 9 (Pictured Below) is installing the twin motors, which are very easy to install.
| Home |
| Copyright © 2009- 2024 ArtisticHobbies.com - All rights reserved |