| ArtisticHobbies.com |
|---|
| Hobby Resources * Model Building Projects * Modeling Resources * YouTube Channel |
| OTHER WEBSITES * Artistic Reefs |
Taigen Metal Tiger I Kit Build - Page #4
This next picture shows what the underside of the turret looks like with all the 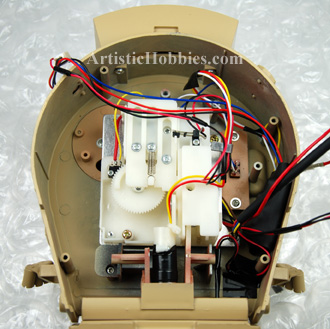 electronics and wiring installed.
This part of the build is pretty straightforward and the manual does a pretty good job of explaining how to install everything.
One thing I did do differently is when it came to soldering the white and blue wires for the switch. To make soldering easier, I soldered these wires first before installing Part (BA) section IR2 of the manual.
After soldering the wires to the switch, I than installed BA, which is the recoil and elevation unit for the cannon.
The next picture below shows the upper deck of the hull and the extra detail work I added. All the smoke launchers on the upper hull received wiring which took about an hour to do because the wires are very small. To make this work, I needed to drill a small hole in the back side of each smoke unit and also in the upper hull. I believe the wire I used was either 18 or 20 gauge wire. Once installed, I used crazy glue to hold them in place.

The screens used on the project are made by Taigen and they fit perfectly on the deck of the hull. Just use crazy glue to hold them in place. After installing the screens, I did primer them to make sure that the top coat of color (Tan) would stick. I think you would agree that the screens and wiring do add some nice detail to the model kit.
The picture blow shows all the wiring installed underneith the hupper hull. You will notice that I added some electrical tape in certain areas; this was added to make sure none of the wires would hang down. This is not necessary since the kit provides several clips to hold the wires in position but just did this to be on the safe side.
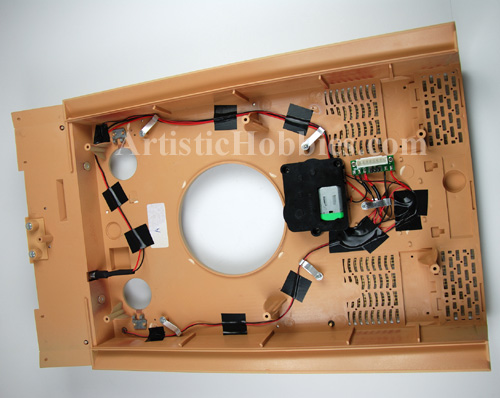
Some soldering is required at this stage of the project (#46) and if you follow the direction and pictures in the manual, you should have no issues with this part of the build.
One of the areas of this build that may discourage some is the soldering. The best way to tackle this is to pre-tin all the ends of your wires first. Pre-tinning is were you apply solder to each of the ends of the wires first. If you have several wires that are going to be attached in the same place, then attach them first, then pre-tin them with solder.
Once the solder is on all the ends of your wires, place that wire end where you want it soldered by using one hand. By use your other hand place the tip of your hot iron on top of the pre-tinned wire and let the solder melt in place. Hope all this makes sense but by doing this will make your soldering experience much easier and fun to.
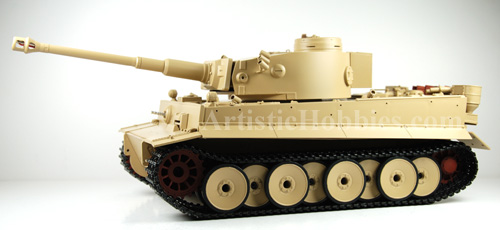
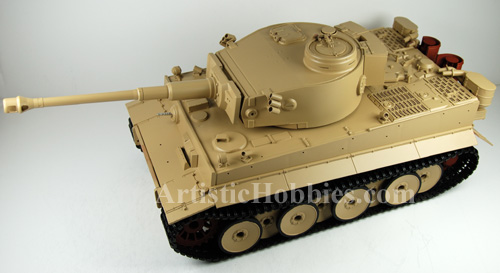
The next two pictures show how everything looks together. Notice that the accessories aren’t put on the tank yet because I need to paint the camouflage colors first. The camouflage colors will be dark red and green. At least that’s what the plan is!
| Home |
| Copyright © 2009- 2024 ArtisticHobbies.com - All rights reserved |