| ArtisticHobbies.com |
|---|
| Hobby Resources * Model Building Projects * Modeling Resources * YouTube Channel |
| OTHER WEBSITES * Artistic Reefs |
Taigen Metal Tiger I Kit Build - Page #3
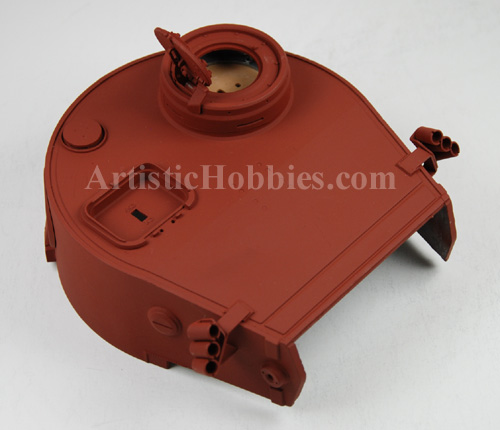
This next picture below shows the starting of the turret by priming it first. I did lightly sand all the smooth areas first before priming just to make sure that the primer would stick.
This next picture shows all the pieces for the turret painted, ready for assembly. You will notice in this picture that the main barrel isn’t painted all the way from end to the other end. This is because the tolerances inside the mantlet are very tight and didn’t want paint on the barrel to cause binding issues when the cannon recoiled.
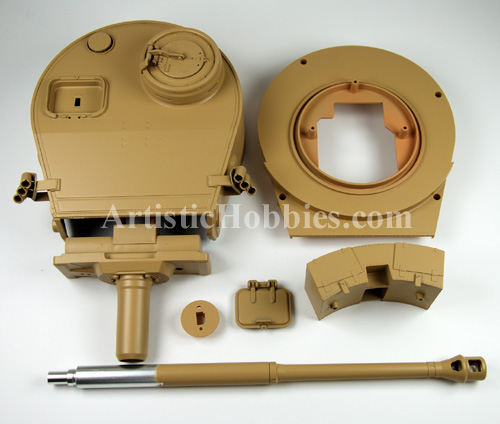
If you’re making the Airsoft version, you can then paint the whole barrel from one end to the other end because the Airsoft version doesn’t recoil. Please note that the barrel is very smooth and needs to be scuffed or lightly sanded before painting or the paint wont stick.

Some of you are probably wondering why I’m not assembling everything first before painting, which is a great question. The main reason is because I’m using pray cans for this part of the painting process and it can be pretty hard painting into some tight places if the pieces were assembled first. If your airbrushing than having everything assembled first is no big deal.
| Home |
| Copyright © 2009- 2024 ArtisticHobbies.com - All rights reserved |