| ArtisticHobbies.com |
|---|
| Hobby Resources * Model Building Projects * Modeling Resources * YouTube Channel |
| OTHER WEBSITES * Artistic Reefs |
Taigen Metal Tiger I Kit Build - Page #10
The next step was using my PanPastel weathering colors to highlight different areas of the wheels especially around the wheel bolts shown below.
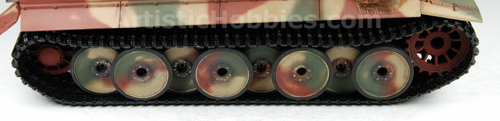
The next thing I wanted to tackle was with the wheel bolts. I just wanted them to stick out a little more, so I got out my handy Dremel tool and started to sand down the edges of the wheels bolts to give them a little wear and tare. Since the wheels are made of metal, I just sanded the sides of the bolts and some of the tops until the metal started to show through.
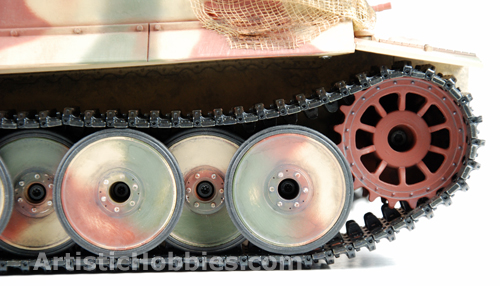
You will notice in the picture above that I also weathered the front drive sprocket with my black wash making sure I highlighted the edges of the wheels. I also did the same to the rear sprocket shown below.
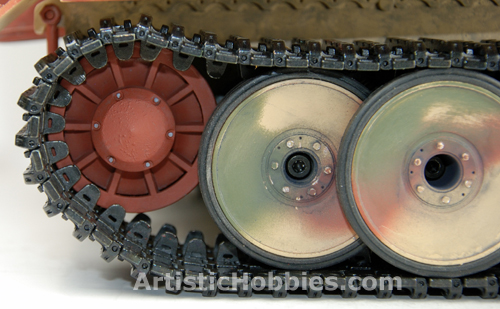
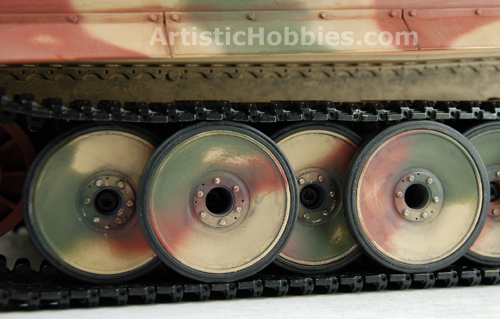
Below is another close up picture of the Taigen Tiger I wheels finished. Notice the weathering I did on the lower hull. Probable should of added some brown colors to the mix but at least it doesn’t look new anymore and looks a little dirty. I can always add more detail to that area later on if I want but for now I'm finished with this area of the Tiger I tank. At least i think so or until i come up with another idea.
One more area that needs to be tackled is the the air cleaner piping, which was found on early Tiger I tanks, which is made out of black rubber tubing shown in the picture below. From December '43 or later didn't have these air cleaners installed.
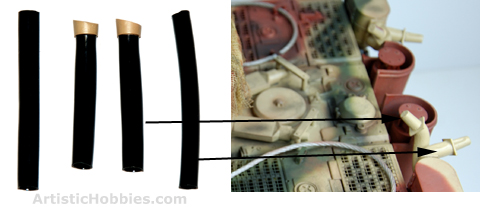
I’m going to paint the black tubing a tan color. In order for the paint to stick to the tubing you must sand down them very well so the paint can stick to them. I think to be on the safe side I’m going to shoot the black tubing first with my red primer. Just to make sure everything sticks because you will be taking these off and on all the time to get into the inside of your Tiger I tank so you can get your battery in and out.
The air cleaner piping tips have already been painted a tan color so they are ready to be weathered using my PanPastel weathering colors. Once everything is painted, it’s then time to weather then some. Don’t forget everyone, a little weathering can go a long way in achieving the look your after. I’m mostly using my dark grays, blacks and brown colors for weathering and some reds for rust.
The next picture on page 11 will show what these look like installed on the Tiger I tank painted and weathered. You will also notice I have stated to highlight all the edges in this area with a light brown color found in my PanPastel weathering kit.
| Home |
| Copyright © 2009- 2024 ArtisticHobbies.com - All rights reserved |