| ArtisticHobbies.com |
|---|
| Hobby Resources * Model Building Projects * Modeling Resources * YouTube Channel |
| OTHER WEBSITES * Artistic Reefs |
Started: 8/14/2014
Build instructor: Gene Wilson
RC4WD Front Steering Linkage Installed on
Bully 2 competition rock crawler Axle
In this tutorial, I we will show you how to assemble RC4WD's front steering linkage on a Bully 2 competition rock crawler front axle. This is a pretty straight forward install that required a 1.5 and a 2.0 hex driver for screwing in the bolts and grub screws. You will also need some thread lock adhesive and at least a 7x2.5mm spacer, which isn’t included in the kit.
Not sure why a 7x2.5mm spacer or something isn’t included with this kit, but I suggest in using one for this install.
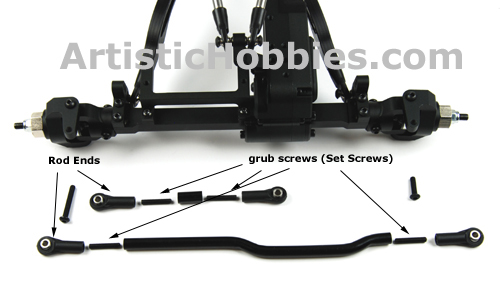
Shown above is all the parts that come in the RC4WD steering linkage kit. To get started, start by screwing in the 4 grub screws (Set Screws) into the rod ends with a 1.5mm hex driver. No lock tight is needed for this.
After you have finished installing them, screw the rod ends onto the linkage ends using lock tight or some kind of thread locking adhesive. This will help keep the rod ends from backing out since the steering linkage on any RC crawler always gets a workout. Shown above is what this looks like finished.
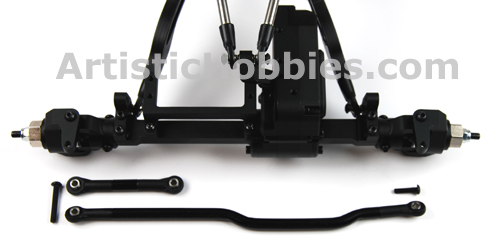
At this point you’re ready to install the linkage onto the Bully 2 comp front axle. There are 2 screws that come with your Bully 2 steering kt. The shorter screw goes on the right side and the longer screw is for the left side, which bolts the two linkages together to the steering arm. You will need your 2.0 hex driver for the bolts.
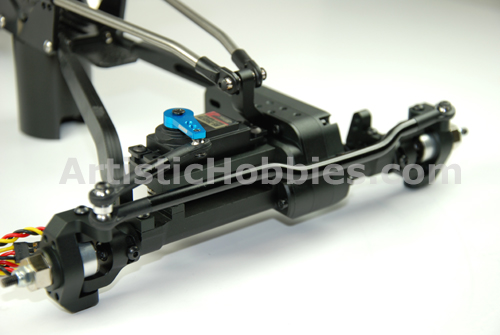
You will want to place a spacer (optional) between the two linkages on the left side. This will help with any binding issues between the servo and steering linkage. Without the spacer, the linkage between the servo and steering arm would be at a angle, which may cause a binding issue. You may find in your application you may need a taller spacer depending on the type of servo you install.
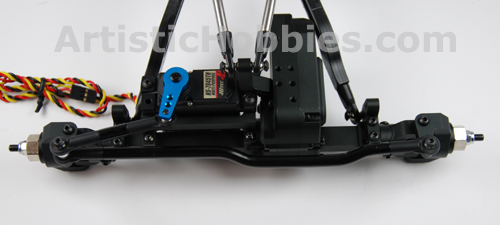
For this build, I’m using a Hitec servo. The metal servo horn that came with the servo wasn’t going to work for my application. So I ended up using a Racers Edge aluminum servo horn. Any servo horn will work as long as it will take a 3mm bolt. To connect the servo to the axle I used 3x10mm hex bolts while using my 2mm hex driver.
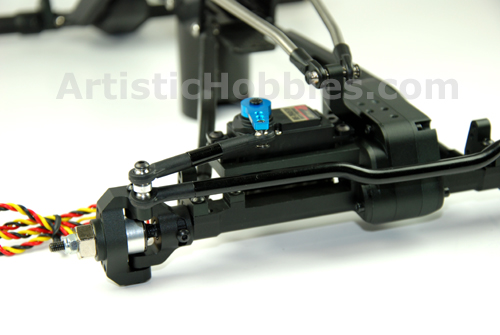
As you can see with the picture above there is still a slight angle between the servo horn and linkage mounting arm even with a spacer. This reduced angle shouldn’t be a problem and I can always add a taller spacer if needed down the road. The server is sitting a little higher than normal because I’m using rubber isolating washers (optional) that come with the servo. Without the rubber isolating washers, the angle on the linkage would be reduced even more.
Hope you enjoyed this tutorial and found it informative. More build tutorials to come on Gene’s RC crawler project.
Back to Model Building Projects
| Home |
| Copyright © 2009- 2024 ArtisticHobbies.com - All rights reserved |