| ArtisticHobbies.com |
|---|
| Hobby Resources * Model Building Projects * Modeling Resources * YouTube Channel |
| OTHER WEBSITES * Artistic Reefs |
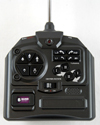
VsTank Antenna Install6/14/2012 In this tutorial, we will teach you how to install a new antenna into your VsTank controller. Before we get started, I would like to caution everyone in For this tutorial we will be using a 07 MCU push button controller shown here (Right) but this tutorial can be used on any VsTank controller including the 06 and the new 07/10 VTX controllers. Even though most 07/10 VTX controllers (Silver/Gold) should have a screw on type antenna, if it doesn’t than read on. Before getting started, please remove all batteries from the back of your controller. This will prevent any possibility of shorting out anything. Since we will be working on the backside of the controller only, it may be a good idea to lay your controller on a towel to prevent scratching the front side of your controller. For tools you will only need a small Philips screwdriver. Before taking the screws out, you must first remove this plastic sleeve (Pictured Below) that holds the antenna firmly in place. Just twist upward to remove this sleeve. All controllers have this plastic sleeve.
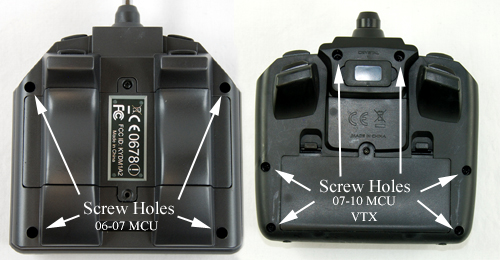
The above picture shows the (Before), showing the sleeve on and the (After) picture showing what it looks like removed. Now your ready to remove the screws. Depending on what controller you have, you will have to take out either 4 or 6 screws from the back of your controller. All 06/07 controllers have 4 screws and the new 07/10 VTX controllers have 6 screws and all located on the backside of your controller pictured below.
Remove all the screws with your Philips screwdriver and place the screws off to Do not yank upward or pull the back cover more than a half-inch because you may break a wire connection. Wires are connected to the front and backside of the controller and some of these wires aren’t very long. That’s why you must be very careful when doing this.
Once removed, you can now replace your old antenna with your new one. When screwing your antenna back in place, be very careful not to over tighten this screw because you may strip the threads. As you can see (Left), where the screw goes in its made of plastic and can be very easily stripped. Once your new antenna is installed, you can now place the back cover back on your controller. Sometimes this can be the hardest part of this project because you must line up everything inside your controller to seat the back cover on properly. Just take your time! Once your back cover is on, Install all your screws and place the antenna sleeve back on. You are now finished! As we stated earlier, your 07/10 VTX controllers should have a screw on type antenna and can be easily replaced by screwing the antenna off from the controller base pictured below.
We hope you found this tutorial very helpful. Back to Model Building Project and tutorials
|
 removing the back cover of these controllers because some wires may be very short and you may damage your controller if these directions aren’t followed correctly. With that said, lets get started.
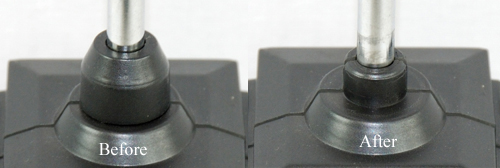
 the side. Once screws are removed, Gently lift upward the back cover only about a half-inch at most to expose the antenna base and screw.
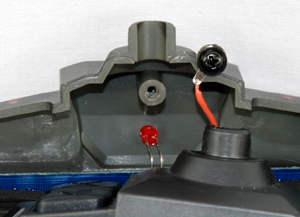 Once the back cover is off to the side, you can now remove the screw (Pictured above) that holds the antenna in place. Pictured to the (Left) shows the antenna removed.
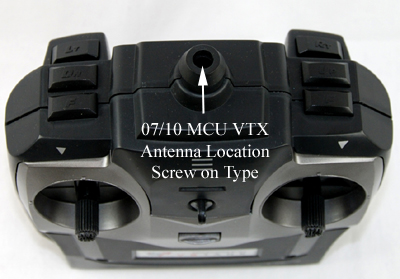
| Home |
| Copyright © 2009- 2024 ArtisticHobbies.com - All rights reserved |