| ArtisticHobbies.com |
|---|
| Hobby Resources * Model Building Projects * Modeling Resources * YouTube Channel |
| OTHER WEBSITES * ArtisticReefs.com |
Tamiya 1/16 Full Option King Tiger Tank - Page 9
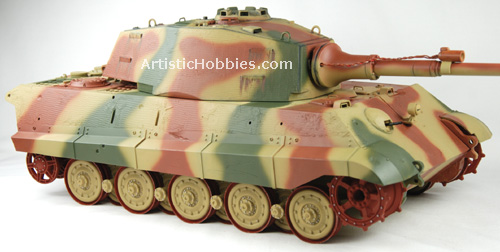
Next came painting the green color on, which I also freehanded using a double action airbrush. Since I’ve been airbrushing for years, the only thing I had masked off were the road wheels. If there was any over spray, I then re-painted that area with that color.
Once I way happy with the paint, I then let everything dry overnight. The next day it was time to get the tank dirty. Since I want this tank to look like it’s been in battle for a long time, I need to give the tank a wash. Yes I said wash. Not a cleaning in that sense, but a wash to give it a dirty look. We achieve this by using a 1/2oz paint jar with 10% black acrylic paint and 90% water. The more paint you add and less water you use will result in a darker appearance. I always like to start off light because you can always add more later on.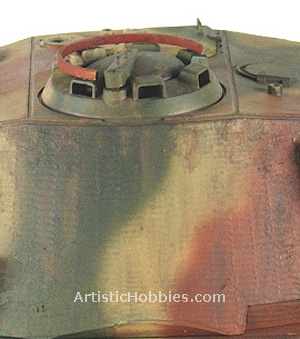
Next take a wide paintbrush and apply the wash in a downward stroking motion. Start with the turret first and work your way down. Don’t put on too much at once, a little will go a long way in achieving a weathered look. I applied one coat of wash and let dry for about an hour.
The picture on your right you will notice there looks to be dirt streaks running downward on the turret. They are made by diluting different colors of browns and using your black wash you made earlier. The big difference is your using a very pointy brush tip and applying your streaks in a downward motion.
To make you brown streaks, mix acrylic light brown color with water, but do a 40/60 fix. 40% paint to 60% water. Then apply in a downward motion until you get the affect you want. Don’t be afraid to let some of the mix run down the side of your turret. This will give you a nice realistic affect of being out in the weather.
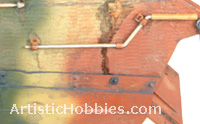 Once your happy with the turret, you then can start on the rest of your tank by doing the same thing as you did on your turret. Again, don’t over do it! Pictured left I used mainly a black wash to achieve the oil drip marks.
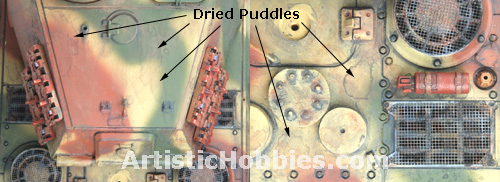
Next come working on the top surfaces of your tank like dried on stain marks, which are very easy to do. Just apply a little dab of brown wash to any flat surface and let the puddle of wash dry. If you apply too much wash and it starts to run. Let it be, this will give you a nice realistic affect. Your puddle of wash might look like a mess but wait until it dries, which may take several hours. You will be amazed in the affect you just achieved.
The stains I applied to the entire tank before I put any of the accessories on it. It’s harder to add a stain once an accessory is in space so you must think ahead. For example, pictured above on the right is a fire extinguisher. Right below the fire extinguisher is a big stain mark, which I did before I glued the fire extinguisher in place.
| Home |
| Copyright © 2009- 2022 ArtisticHobbies.com - All rights reserved |