| ArtisticHobbies.com |
|---|
| Hobby Resources * Model Building Projects * Modeling Resources * YouTube Channel |
| OTHER WEBSITES * ArtisticReefs.com |
Installing left stick self centering kit
in Futaba 2.4 GHz T4YF Radio
The Futaba 2.4 GHz T4YF 4 channel Radio is a great radio for all Tamiya 1/16 Full Option tanks including the hard to configure Sherman. This radio is highly recommended by our company and is the only radio we will carry based on the easiness of installing and programming the radio.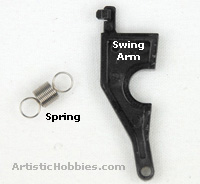
Some people like the fact that the left stick isn’t self centering but you will have to determine if making the left stick self centering is rite for you.
PARTS NEEDS:
Swing arm part number is HSP78901
Spring part number is HSP67450
 This project is a fairly easy to do and can be finished in about 10-15 minutes. The tools needed for this project is a fillips screwdriver and needle nose pliers. Once completed, both sticks will be self centering.
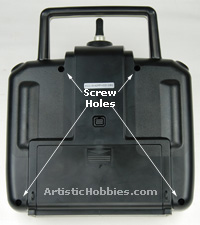
To get started, you will need to take off the rear cover of the radio that is held in place by 4 screws (Left). Your fillips screwdriver will be needed for this part of the project.
Please keep in mind when taking off the rear cover that the battery wire is on the short side; so don’t yank on the rear cover when taking it off. (Below Picture).
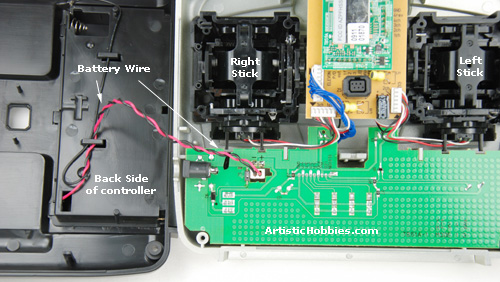
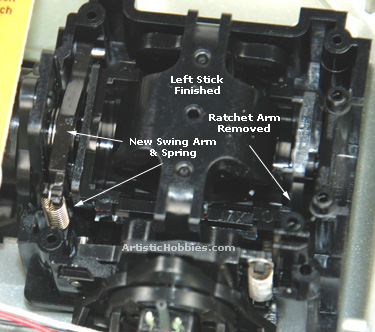
Once the rear cover is removed, you can begin to install the swing arm and spring. Since the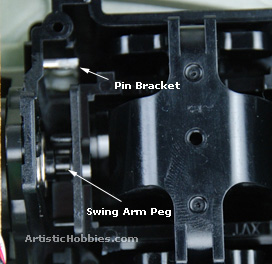 right stick is already self-centering, you can use it as a reference to see were everything goes.
First off, install the swing arm. You will notice that the swing arm on one end has a small hole in it. Slide this hole over the “Pin Bracket” (Right) and then lay the swing arm over the “Swing Arm Peg”. Once installed, it’s time to install the spring.
Installing the spring can be a pain since its very small in size, but take your time with this part of the project. Use a good pair of needle nose pliers for this part of the project.
Again, use the right stick as a guide to see where to place the spring.
One side of the spring connects to the swing arm and the other end of the spring connects to a small hook directly underneath the swing arm.  Once the lower spring is hooked, pull the spring up and over the swing arm. Again, use the right stick as a guide to see where to place the spring.
Once the spring is installed, remove the “Ratchet Arm” (Left). If you don’t remove the ratchet arm, your self centering install wont work.
Once the ratchet arm is removed, your now ready to reinstall the rear cover.
You are now finished! We hope you found this tutorial very helpful.
Back to Model Building Projects
| Home |
| Copyright © 2009- 2022 ArtisticHobbies.com - All rights reserved |