| ArtisticHobbies.com |
|---|
| Hobby Resources * Model Building Projects * Modeling Resources * YouTube Channel |
| OTHER WEBSITES * ArtisticReefs.com |
1/25 model - German Tank Destroyer (Page 5) |
After the face was finished I started on filling in all the body gaps. For this I used Testors There were some seams along the arms that needed some filing down also, so I used my 4 sided Emery Board (AH00900) for this. After everything was sanded down and all the body gaps were taken care of. It was time for some black paint to cover up the seamless body. I used the paint straight from the bottle, which covered up any scratch marks on the body of the soldier. After I had let the black paint dry for about 1 hour. I diluted some white paint by 80% with water and applied it to the black jacket. This gave the jacket a weathered look.
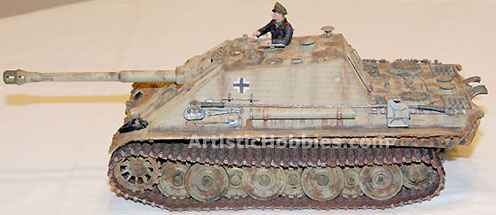
There are a lot of aspects of this model I did not cover like the accessories and weathering the tread. The tread weathering we are going to have a separate tutorial sometime in late January or February. As you can see (Below), the finished model looks like it’s been in combat operations for quite a long time and keep in mind, this is a fully working IR remote control tank that can be used with all other VsTank IR tanks. The question that is probable going through everyone’s mind is why did I buy a fully workin
Back to Model Building Projects
|
 Contour Putty (
 Notice his left hand is open. I’m going to make a map out of paper and put it under his hand. Another option would be to put a machine gun there.
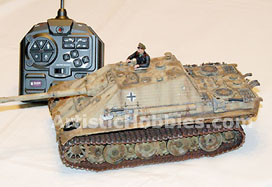 g Vs Tiger Tank and not just buys separate parts like the MCU board, controller or the cannon. The cost of buying separate parts would cost a lot more than just paying $109.95 for a fully working Vs Tiger Tank and plus there’s some parts that you just cant buy or there not availing like the Tiger MCU board. So buying a fully working VsTank gives you all the parts you need. The extra parts you don't use from the VsTank you can always sell on EBay if you want to cover some of your costs in a big project like this.
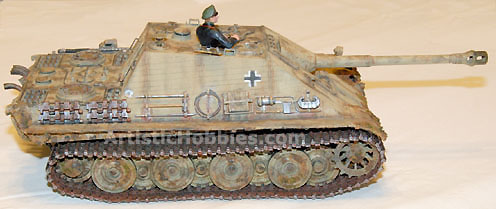
| Home |
| Copyright © 2009- 2022 ArtisticHobbies.com - All rights reserved |