| ArtisticHobbies.com |
|---|
| Hobby Resources * Model Building Projects * Modeling Resources * YouTube Channel |
| OTHER WEBSITES * ArtisticReefs.com |
Armor Diorama Build - Part 2 |
The design of my diorama will be located in the countryside among a big tree, shrubs, rocks and the tank waiting for the first kill of the day. The design of your diorama scene can be as simple as laying down sand all over and maybe putting some rocks around but It’s up to you and your Before I forget, I put a clear rubber like padding on the bottom of each corner of the diorama base shown here (Right). This will prevent scratching your tabletop or your bookshelf. Ok, back to the diorama ground. Like I said before, I will be placing a large tree in the background to add height and scale to the scene. Remember to always put bigger items, like trees in back I decided I wanted the tree to be on a small hill, so I cut out a small triangle shaped piece from my extra pink foam board I had laying around. Small hills can go a long way in giving your diorama scene that extra detail. Don’t forget, the ground is not always flat. Again as with trees, always put the bigger hills in the rear and smaller hills towards the front of your diorama scene. If you do decide in putting a large tree in front, make sure it doesn’t cover up your main viewing area, which in my case it would be the tank. Since I’m happy with the shape and size of my small hill, It was time to shape the hill. I used a very sharp cutting blade and contoured the sides until it had a gradual slope to it. When cutting pink foam board, make sure you cut in an up and down motion (sawing motion) especial when creating complex designs. If your just cutting a straight line, than you don’t need to cut in a sawing motion. After I was finished making my cuts, I sanded down all the hard edges with sandpaper until they were all smooth. After I was finished sanding my small hill. It was time to glue it in place. But before this I Now it’s time to give our hill a little detail. To do this, I laid a sheet of tissue paper over the hill and make sure it covers the entire hill your making. I’m using acrylic craft paint (8oz size) found To start painting the hillside, I used the brown paint starting on top of the hill working my way downward. As you work your way down your You will notice in this larger picture (Bottom) I dug into the foam base. This gives the ground ditches and small mounds. This will add detail to The main reason I use tissue paper is because it’s cheep and everyone has tissue paper in there homes. You can also use drywall compound or even fiberglass cloth to create your hills and mounds but not everyone has these items lying around the house.
|
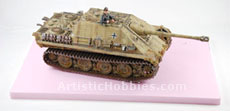 While the stain is drying on your diorama base we can get started on the diorama ground (Left). As you can see the tank fits pretty well on the pink foam board. At this point it’s time to come up with a road map for your diorama design.
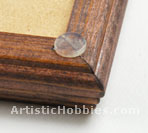 imagination.
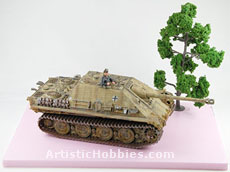 and smaller items in front. So I placed the tank and the tree on the pink foam board to give myself an idea on how it’s going to be laid out.
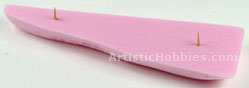 inserted two toothpicks (Right) into the bottom side of the hill. This helps keep the hill in place while the glue dries. To glue the hill in place, I used
 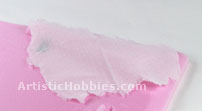 at your local Wal-Mart Store for about 96 cents each. I always have 5 colors on hand, Black, White, Dark and Light Green and Brown. When it comes to your brush, make sure that the bristles are very stiff because you will be dabbing the paint onto your hillside and the diorama base.
 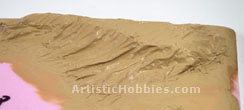 s mall hill, use long strokes (Do not Dab the paint) and it will give you this affect pictured here. This long stroke affect (Right) will give your small hill vanes in it, which gives your hill the appearance of water runoff. But most of this will be covered up by moss and brush later on.
 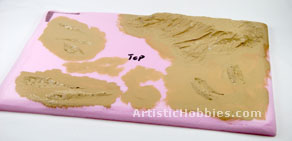 your ground once it’s finished. To make the small ditches in the pink foam board I just use my
 | Home |
| Copyright © 2009- 2022 ArtisticHobbies.com - All rights reserved |