| ArtisticHobbies.com |
|---|
| Hobby Resources * Model Building Projects * Modeling Resources * YouTube Channel |
| OTHER WEBSITES * Artistic Reefs |
Camouflage Netting Project |
First off, I just want to apologize for the wait in this project. It’s way over due but I finally found time this past weekend to start on this project. It turned out to be a fairly fast At the end of this tutorial I will provide a parts list with everything I used. Well, lets get started. First off, I unfolded the tack cloth until you can’t unfold the tack cloth anymore. After unfolding the entire tack cloth. I ended up cutting a 17” x 18” piece for my project, but you can cut any size you want for your project and scale. My netting is for 1/24th scale. Next I pinned the tack cloth to foam board so when your airbrushing, the air from the airbrush won’t blow the netting around. My next decision was which colors I would be using on my netting. I decided I would use Model Master green as the main color with highlights of red and black.
In between painting the color, it’s a good idea to peal away the netting from the foam board to make sure that the paint is not sticking to the backside of the netting. I did this several times during the painting process.
Turn over the netting a few times during this process to the front side making sure that the paint is being absorbs by the tissue paper.
|
 project that can be finished over a weekend.
 I got out my Aztek A220 single action airbrush, which makes large project a snap, plus it’s very easy to clean up after using. Just soap and water! I first mixed 75% green to about 25% thinner and mixed the two together using my Badger paint mixer. I did about two heavy passes of green and then I let it dry for a few minutes.
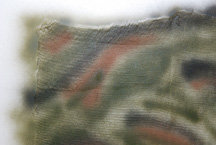
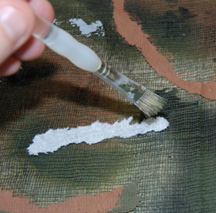 To add more detail to the camouflage netting, I decided to add some solid camouflage patterns to make the camouflage netting look more realistic. So what I did was I turned over the netting (Back Side) and tore different lengths, shapes of tissue paper and laid them on the backside of the netting. Tissue paper has two layers, only use one layer at a time. Then dab the colors red and black until the tissue paper absorbs the paint. The idea here is that you still want to see the netting detail on the front side of the netting.
| Home |
| Copyright © 2009- 2024 ArtisticHobbies.com - All rights reserved |