| ArtisticHobbies.com |
|---|
| Hobby Resources * Model Building Projects * Modeling Resources * YouTube Channel |
| OTHER WEBSITES * Artistic Reefs |
Taigen Metal Tiger I Kit Build - Page #6
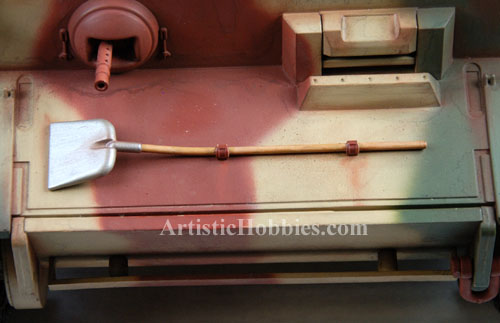
The next accessory I started painting is the shovel, which is placed on the upper hull in front. First I strayed my Ruddy Brown primmer on it to make sure that the paint would stick. Then I used Model Master steel and Wood color. I put about 2 coats of steel color on the shovel end and about the same with the wood color on the shovels handle.

To be honest everyone, I did have to use a magnifying glass to paint the wood color on the handle. Without it, I would be up a creek without a paddle when it comes to painting small detail areas like this shovel. What’s nice about priming the shovel first is that some of the brown/red shows through the wood color giving it a grainy wood look. Below is how the shovel looks on the tank.
At some point all modelers change their minds about what they want to put on their model or change all together. Well this is no different! Instead of using the plastic tow cables that come with the kit, I’m going to be using Taigen’s metal tow cables. The big issue with this idea is that I’m going to have to make my own tow cable brackets to hold everything down. This should be fun???
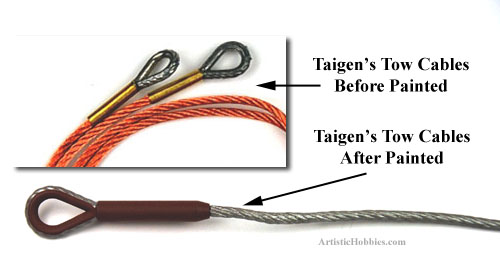
The first area of business is painting the tow cables with ruddy brown primer and then the steel color I used on the shovel. First I sprayed the primer on the ends of the cables (Cable Eyes) first and then let dry, about 40 minutes at most. Then I painted the cables with the steel color. It took about 3 coats to do the job.
If I had to do it over again, I probable would have primed everything including the cables. This way if you have some of the primer color showing through the steel color. It may look like rust??
Again, I had to use my handy magnifying glass to paint the steel color on the ends of the tow cables shown above.
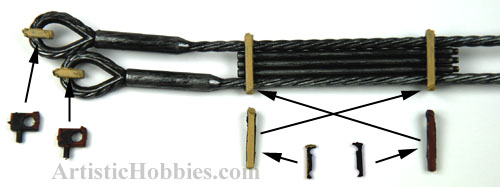
The next area of business is barrowing some pieces from the plastic tow cable assembly shown above. Just used my handy cordless Dremel tool and started cutting. I also had to drill some holes and rounded out some sections to make everything fin correctly shown above. Hopefully these pictures give you guys ideas you can use on your Taigen Tiger I tank build. You can also make custom brackets from styrene if you wanted but for this build I wanted to use as much as possible from the kit and also to show you guys the endless possibilities for creating your own custom parts from what you already have.
The next set of pictures show below is what the tow cables look like on the Taigen Tiger I tank. OK, I changed my mind again about the brackets that hold the cables in place. I ended up making them out of K & S 1/64 x 1/8 Copper Flat Bar K&S. These are very easy to cut and bend, but you must make sure that you primer them before painting or the paint wont stick very well. I just thought making these brackets out of copper flat bar just looked better than the plastic ones i just cut out, shown above. What do you think?
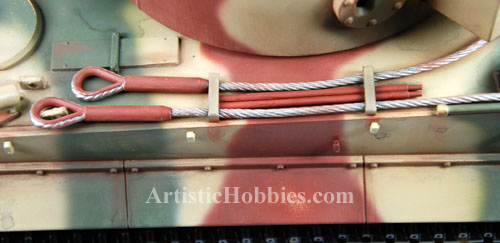
The metal cannon cleaning rods, which are shown between the cables are made from K & S 3/32 aluminum Tube K&S. For this i cut using my cordless Dremel tool and then inserted a metal rod at one end of the tubbing. Then i just primered them and glued them in place.
| Home |
| Copyright © 2009- 2024 ArtisticHobbies.com - All rights reserved |